
Completing the job entry > Repository
The last section we’ll discuss is Repository. Every job you input into RB9 will have a Repository section. Use this section to upload important files that pertain to the job.
First and foremost, you should upload the notice to the job. The notice, when uploaded to the job, will automatically attach to the Assignment Notification email sent to your assigned resources. Other files you’ll want to upload could be copy order forms and errata sheets.
Step-by-step instructions
To upload a new file, click
 to the right of Repository.
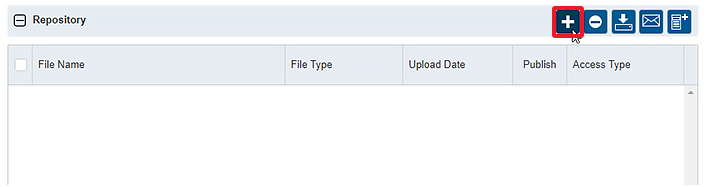
In the Select Files section, drag your file into the box or click inside the box to upload the file.
After selecting your file, you will see it listed at the top of Select Files. If you have additional files to upload for this job, repeat this step.
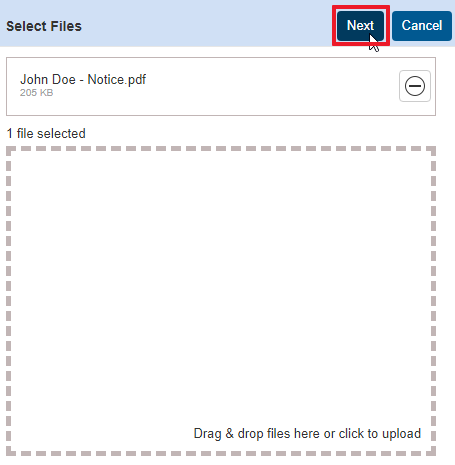
Once you have all the files listed, click Next.
- In the New Repository section, you will see the file(s) you’re uploading. You will need to set some options:
- File Type is important for RB9 to know which files to include with different communications. In my example, since I’m uploading a notice, you can see I selected “Notice” as the file type.
- Publish is important if you have RB Connect. If you check Publish, that file can be downloaded by clients and/or resources in RB Connect.
- Access Type is used in conjunction with Publish. If files are published, you set the Access Type for who can download the files.
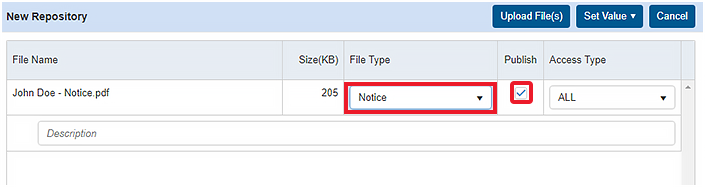
- Lastly, enter text in the Description field if you want to include a description about the file. Repeat these 2 steps for all files listed in the New Repository section.
- Once you’re done, click Upload File(s) to complete the upload.
Next step Pre-assigning resources
NOTE: If you do not pre-assign resources, you can skip to Confirming next-day calendar.