
Creating DYMO label templates
You can print labels out of RB9 using a DYMO label printer. Beforehand, however, you must set up a DYMO label template that will automatically include the recipient mailing address, plus your company logo and other information, if desired.
NOTE: DYMO software version required
Your DYMO label printer should be installed and working prior to attempting to print labels from within RB9. You should install DYMO v8.7.1 if you are using Windows. (If using MacOS, please contact OMTI Support.) At this time, do not use v8.7.2 or .3 as they are not compatible. Here’s the download link for v8.7.1: http://www.dymo.com/en-US/dymo-label-software-v871-windows#
This version and any higher versions will install the DYMO WebService, which is required.
Step-by-step instructions
After installation, launch the DYMO software.
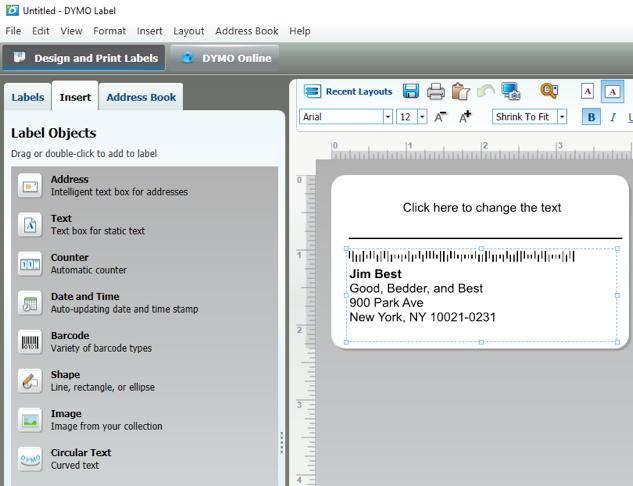
On the left side, locate the 3 tabs, Labels, Insert, and Address Book. You will be working with 2 of these to create your own label.
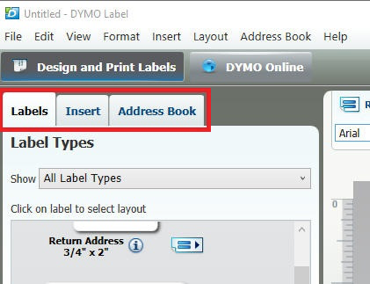
First, select the label type you will be using from the Labels tab. You will need to know the dimensions of the label your DYMO label printer will be using. When you click the label type that matches your DYMO labels, different layout styles appear on the right of the screen. Click the option that works best for you, or select the blank option at the bottom to create your template from scratch.
In my example below, I clicked “Large Shipping 2 5/16” x 4,” and to the right of that, it shows me the layout options to choose from.
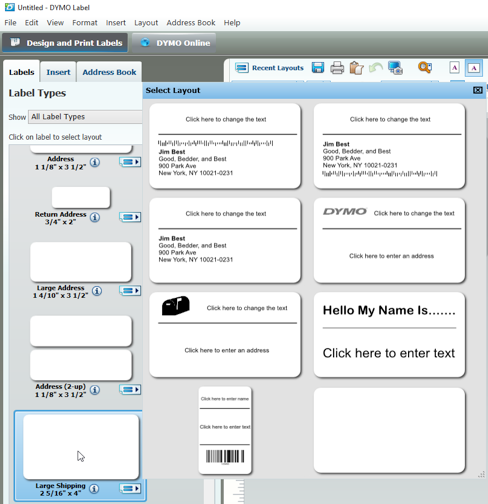
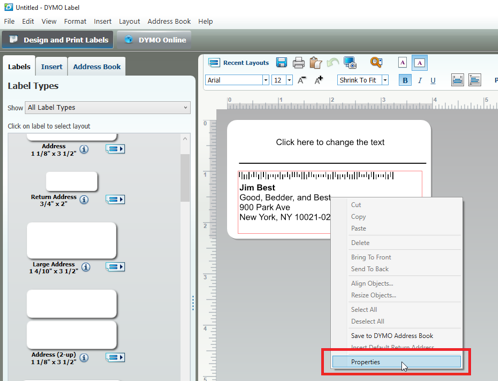
After selecting the label type and layout, you’ll see the default label on the right side of the screen. In this example, I chose a layout that is already formatted with an address. Right-click on the [address] > Properties to see how the data field is linked.
In the Address Object Properties window, click the Advanced tab. The Reference name field should have the word, Address, already input. “Address” is the link to have RB9 merge the address onto the label. So, if you’re using a predefined layout, it should already be set.
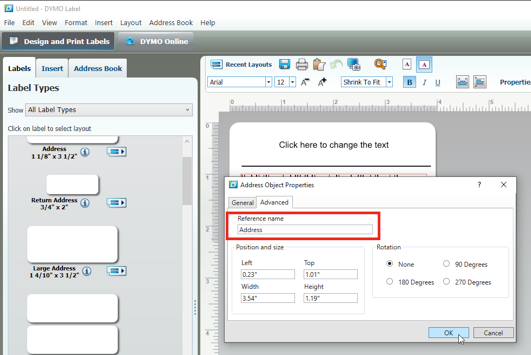
If you are adding your own text box instead of using a predefined layout, be sure you add the word, Address, to the Object Properties of the text box you create.
Now, let’s talk about the Insert tab. The Insert tab can be used to add items to your label. Some useful adds would be a logo image or even an additional text box. Below you can see the options on the Insert tab.
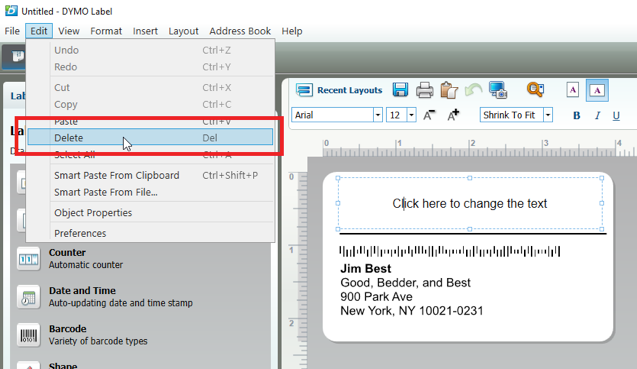
Let’s say I want to add a logo image to the label. First, I’m going to delete that top text box. Click anywhere inside the text box, so that it makes a dotted highlight around the entire text box, see below. Then click Edit > Delete or simply click Delete on your keyboard.
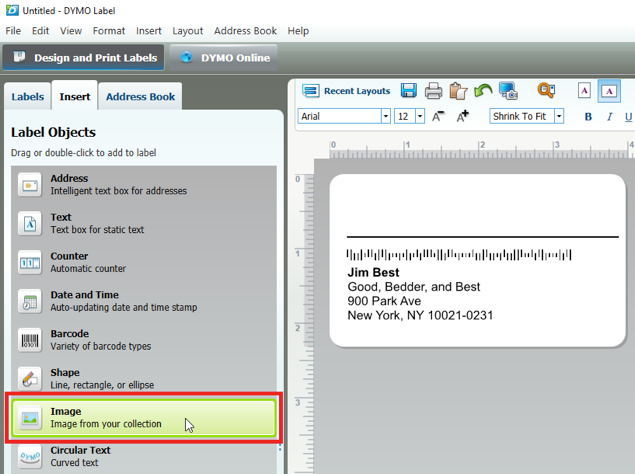
Now it’s time to add the logo to the label. Left-click Image in the Label Objects list, and hold the button down on your mouse. Then drag it onto the label template on the right of the screen and release.
The Image Object Properties window appears. For Image source selection, check File, then click Browse. Select your logo and click Open. You will then see a preview of the logo you selected. Click OK to add the logo.
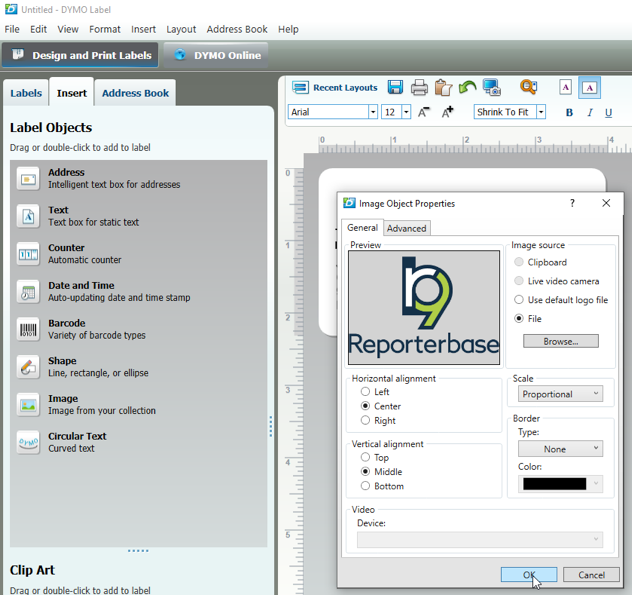
- Once the logo is added to the label, you can resize it by using your left mouse button to click on one of the squares and drag the logo to the desired size.
- When you’re done creating the label template, click File > Save As to save it on your computer. Remember where you saved the file so you can find it to add to your RB9 Label Templates function.
Upload label template into RB9
Store your DYMO label templates in RB9 for easy retrieval by you and everyone else on your team.
Step-by-step instructions
- In RB9, click Tools > Label Templates.
- Click New > DYMO.
- Drag the label template you saved into the upload section, or select it by navigating to where you saved it and click Open.
- Click Upload to complete the process.
For more information about using DYMO labels in RB9, see Labels in the RB9 User Guide.