
Confirming calendar via phone
If you confirm your calendar by telephone, it would still be beneficial to use the Send Job Confirmations/Cancellations function because you’re selecting a specific date and only looking at those jobs. But, if it’s easier for you, and you’re already in Jobs (List View), you can still pull up those jobs based on job date and get the same results.
In this example we’ll use Send Job Confirmations/Cancellations.
Step-by-step instructions
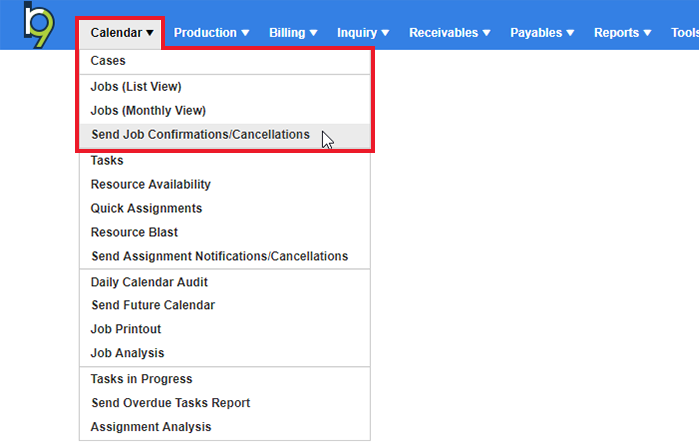
Click Calendar > Send Job Confirmations/Cancellations.
Since you’re confirming for a specific job date, select “Job Date” for the Date Type drop-down selection. For the actual date, select tomorrow’s date, since you’re confirming tomorrow’s calendar. Then click
 (Search) to display all the jobs.
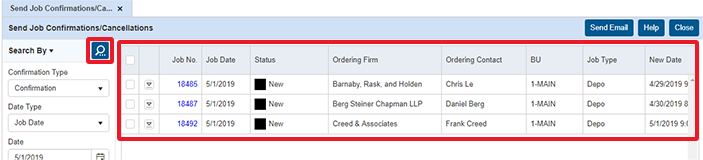
On the right side, you should now see all the jobs for tomorrow. The job number is a clickable link, so click the first job number to enter the job setup.
Click Edit at the top right of the View Job screen so you can make a job status change after calling the client.
-
In the Ordering Client section, click
 to the right of the Scheduling Firm field and select “View Firm” in the drop-down. The reason you’re viewing the Firm details is to look up their telephone number so you can call them.
 You will also have all the job details in front of you while you have them on the phone when asking them if the job is confirming or not.
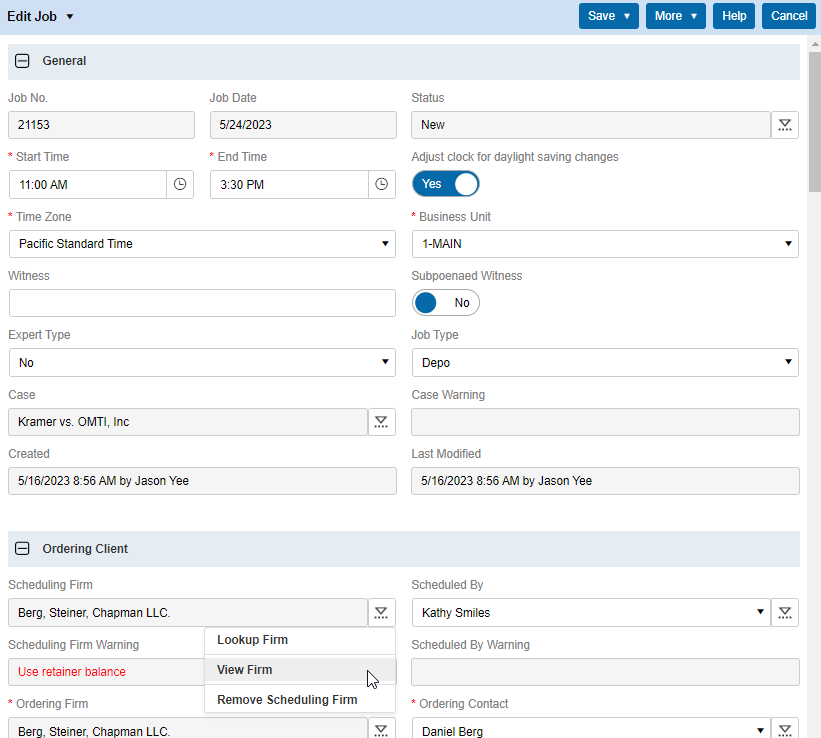
Place the call, then close the View Firm panel to return to the job setup.
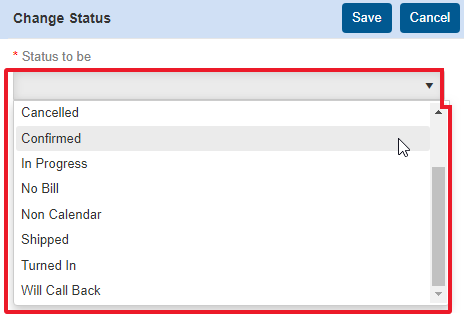
At the top of the Edit Job screen, you will see the Status field. Click
to the right of that field and select Change Status to Confirmed. (If the client canceled the job, select Change Status to Cancelled.)
If you want to change the status to something else or you want to make notes on the status, select Change Status to Other. In the Change Status section, click the drop-down arrow in the Status to be field and select one of the default job statuses you would use for confirming the job, such as “Will Call Back” if the client is not sure yet or you didn’t get a hold of them.
It is recommended that you leave Remarks as well, detailing any conversation you had with the client.
Once you have your data set, click Save to return to the main job detail screen. Then click Save again to close the job detail screen.
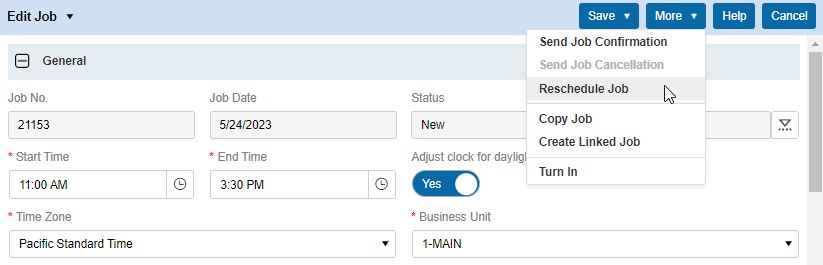
Let’s talk about one last Job Status change you have as an option. The process is the same, starting from step 6. But this time, the client is telling you the job is rescheduling. In the job detail screen, click More > Reschedule Job.
When you reschedule a job in RB9, the original job will automatically be cancelled and all the original job information will be copied to a new job. All you have to do it pick a new date and time.
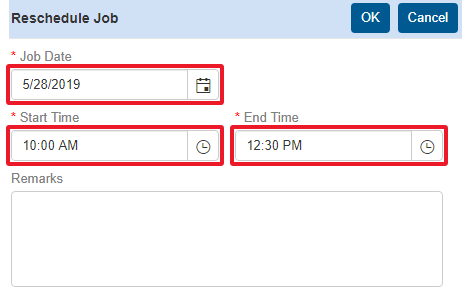
After you click OK, the new job will be saved and you’ll return to the original job to see that the status of that original job is now “Cancelled.”
Repeat these steps to confirm all jobs on your calendar via telephone.