Creating user accounts
Creating your own User Accounts is important for a couple of reasons:
- RB uses a Named License System, and everyone who will be logging in will be using a license, so we must keep the actual user accounts active.
- You’ll also want to have everyone using their own account so you can keep up with who’s inputting and changing data in RB.
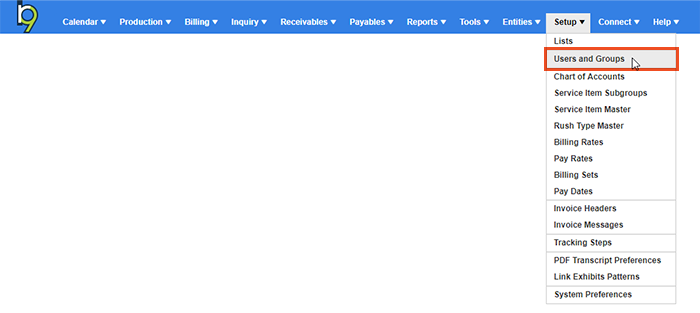
NOTE: To access Users and Groups and set up user accounts, you must log in as Administrator or another account belonging to the Administrators security group.
Step-by-step instructions
Click Setup > Users and Groups.
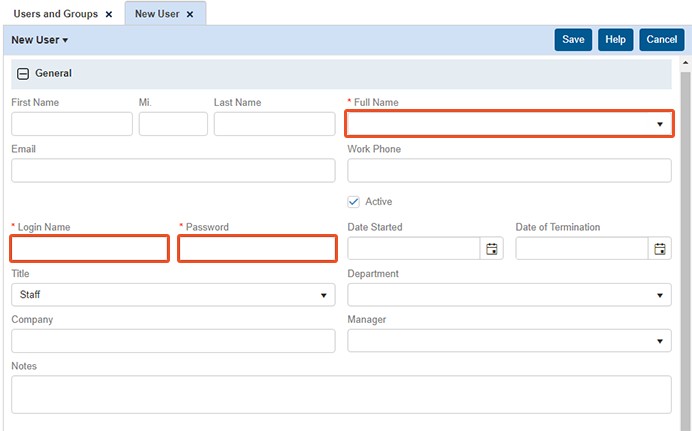
By default, RB will display all active accounts. To create a new account, click New at the top right.

In the General section, fill in all basic information about the user. Note the required fields in this section are Full Name, Login Name and Password. The password is case sensitive.
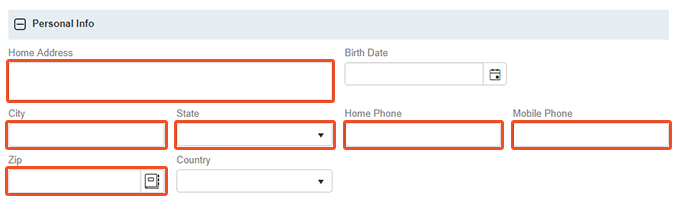
The Personal section allows you to input the user’s home address with contact phone numbers.
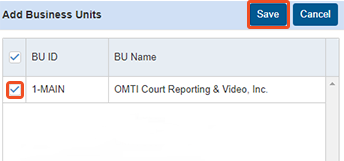
Once all information is input, click Save at the top left. The Add Business Units section opens to the right. Check the BU’s the user should have access to and click Save.
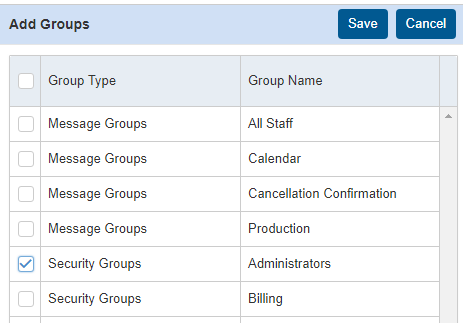
In the Groups section at the bottom left of the user account setup, you can add or remove security group access for the user account. By default, all users belong to the Users security group. You should make sure and have one or more Administrator accounts, that way they have unrestricted access in the program and can be seen as the go-to users for everything related to RB. Click the + sign to add groups to the user setup.
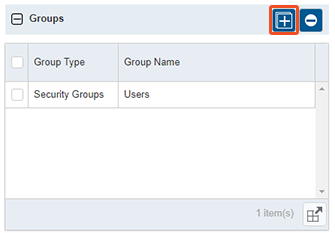
To the right, the Add Groups section will appear. Here you can check the Security Groups and/or Message Groups the users should belong to. For more information on creating Security Groups and Message Groups, see the next step or refer to the RB9 user guide. Once you have everything checked, click Save.