
Setting Connect preferences: Contact–Calendar
This preference section contains all the customization options for new job requests that your clients submit via RB Connect.
Step-by-step instructions
- On the left-hand side of the Connect Preferences screen, click Contact–Calendar.
To customize any job settings, click Edit.
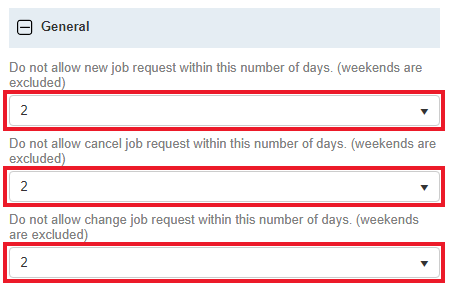
In the General section, let your clients know how many days notice you need for job scheduling, job cancellations, and change requests here. Simply choose the number of days from the drop-down and save your changes.
This is important because you want to have ample time to recognize their request and make sure it’s on the calendar as they’re requesting. We recommend setting 2 days notice to ensure your staff has enough time to accommodate client requests.
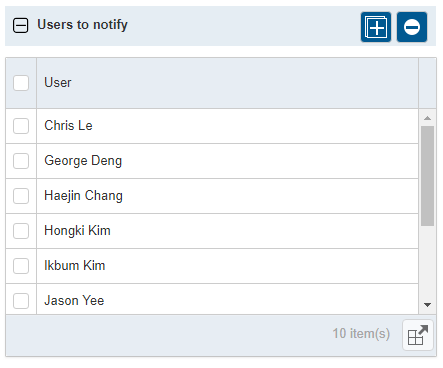
In the Users to notify section, designate who from your team gets notified when a client submits requests from RB Connect. Notifications will be for new job scheduling, confirm requests, change job information requests, and cancellation requests.
To add staff members to the list, click
 . Then in the Add Users panel, check the box(es) of staff to be notified of client requests and click Save.
To remove someone from the list, check the box next to their name and click
 , then click Yes in the popup.
NOTE: Notifications will be sent in the form of a message to users’ Notifications & Messages inbox in RB9. If your staff wishes to receive carbon copy emails from the system in addition to the RB9 notifications inbox, make sure they have Forward carbon copy set to Yes in their User Preferences.
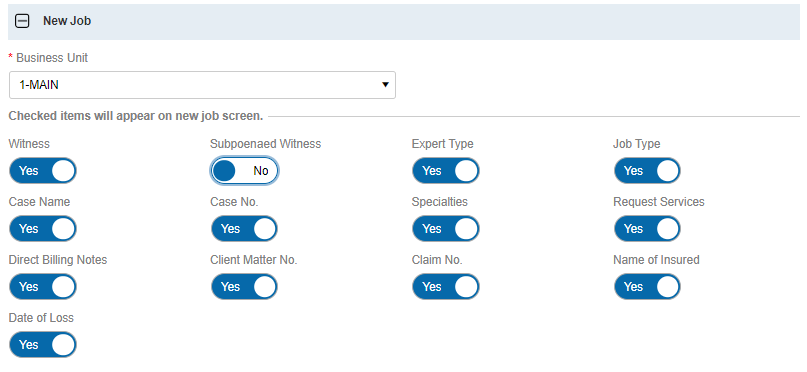
In the New Job section, select a BU in the Business Unit drop-down to be the default for new job requests made through RB Connect.
The Checked items will appear on new job screen section gives you the ability to include any of these non-required fields on the Request Job screen in RB Connect. Set the sliders to Yes for any fields you want to give your clients access to.
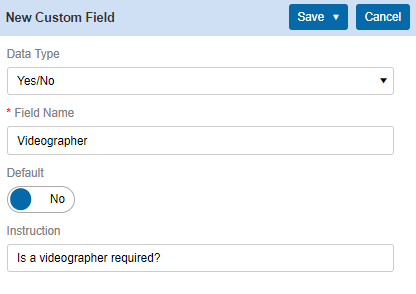
In the Custom Section in New Job pane you can add your own input fields or questions to the Request Job screen. Click
 , then in the New Custom Field panel customize the item you wish to add.
 Set the data type and give your new field a name. Then depending on the type, you can make the item a required entry to request a job, set the default for list options, and include instructions for your clients on how to complete the custom field.
Click Save > Save & New to repeat this process for any other custom fields you want to appear in the Request Job screen. Click Save > Save & Close when finished.
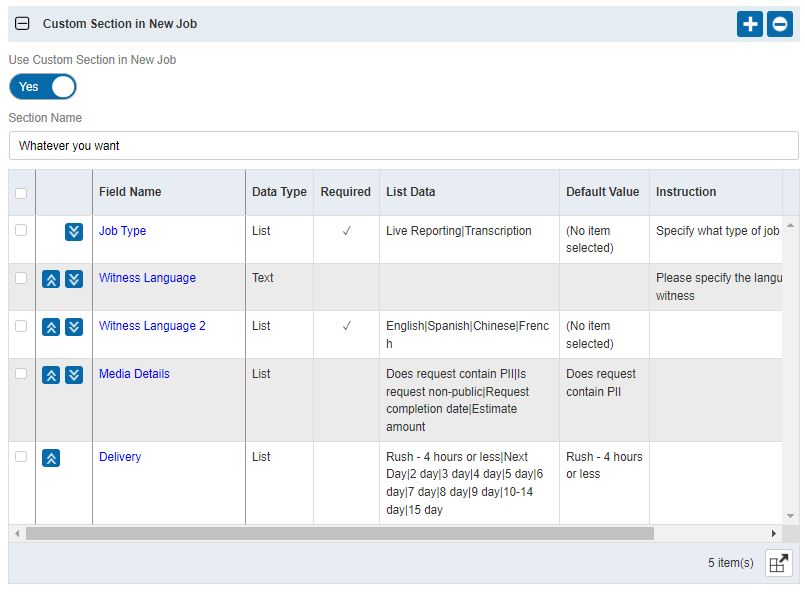
In the sample below we’re asking if the job requires a videographer.
In New Job Notification, you can set RB Connect to send an auto-reply acknowledgement email to your client when they submit a request for a new job through RB Connect.
To turn this function on, set Send Notification for New Job to Yes and use the word processor below to customize the subject and body of the email.
One particular feature to note is the ability to use merge data fields (click
 to display and select available fields), which add data (e.g., case name, ordering contact, job date, job time, etc.) from RB9 to the email subject or body.
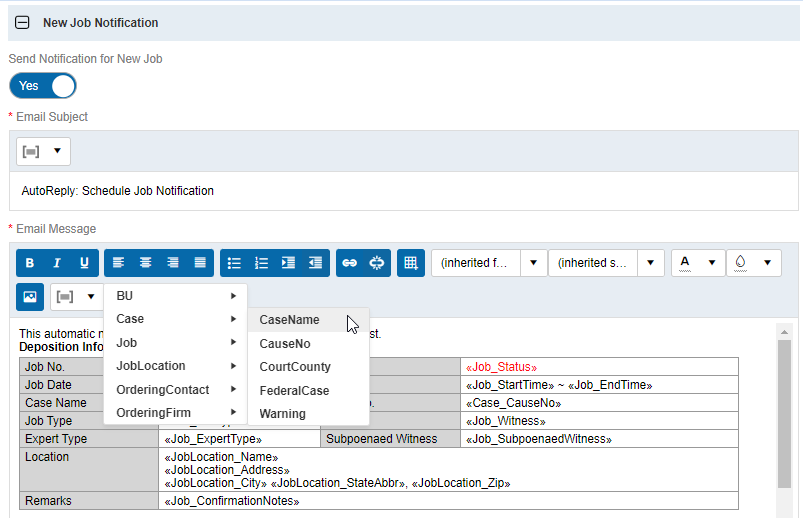
Request Confirm Job Notification and Request Cancel Job Notification sections work the same as New Job Notification.
- In Request Confirm Job Notification, you can set RB Connect to send auto-reply emails when clients request to confirm jobs.
- In Request Cancel Job Notification, you can set RB Connect to send auto-reply emails when clients request to cancel jobs.
To turn these functions on set their sliders to Yes, then use the word processor and merge data fields (click
to display and select available fields) to customize the subject and body of the emails. - Click Save at the top right of the Contact–Calendar panel to save your changes.