
Setting Connect preferences: Resource–Jobs
This section is for customizing the resources’ Job Calendars. These settings will affect job information displayed for their jobs.
Step-by-step instructions
- On the left-hand side of the Connect Preferences screen, click Resource–Jobs.
To update preferences displayed, click Edit.
-
In the General section, set preferences for assignment notifications.
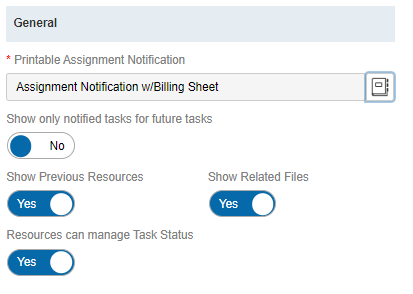
- In the Printable Assignment Notification field, click
 to choose the default assignment notification form that RB Connect will print when resources need a copy. In the Printable Assignment Notification panel that appears, click a hyperliked form to select it. If the form does not appear in the default list, select a different Form Group from the drop-down to select from.
 - Slide Show only notified tasks for future tasks to Yes if you pre-assign resources, but do not want jobs to show up on their calendars until you send Assignment Notifications.
- Slide Show Previous Resources to Yes if you would like your resources to see who else has been assigned to jobs related to the same case.
- Slide Show Related Files to Yes if you wish to give your assigned resources the ability to download files related to the case and jobs for the case.
- Slide Resource can manage Task Status to Yes if you wish to allow the assigned resources the ability to change the status of their assigned task.
- In the Printable Assignment Notification field, click
- In the Users to notify section, designate who from your team gets notified when resources request to be assigned to their clients job. If you utilize Client Of in RB9, this setting is for those Resources who bring in their own clients.
To add staff members to the list, click
 . Then in the Add Users panel, check the box(es) of staff to be notified and click Save.
To remove someone from the list, check the box next to their name and click
 , then click Yes in the popup.
NOTE: Notifications will be sent in the form of a message to users’ Notifications & Messages inbox in RB9. If your staff wishes to receive carbon copy emails from the system in addition to the RB9 notifications inbox, make sure they have Forward carbon copy set to Yes in their User Preferences.
-
Click Save at the top right of the Resource–Jobs panel to save your changes.