
Setting up Service Item Master
The next part of rates setup is to create your individual billable services, which are called Service Items. The Service Item Master is where all of the service items are stored, along with their preliminary settings, which are automatically inherited by any new billing rate and pay rate, when created as new.
Step-by-step instructions
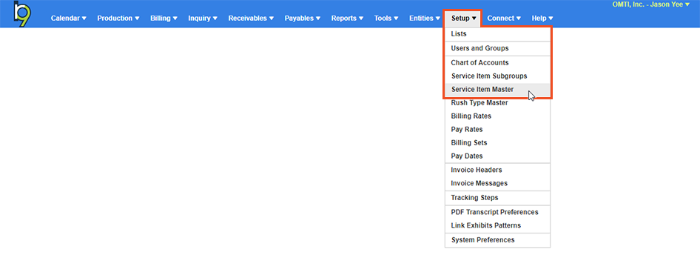
To access the Service Item Master, click Setup > Service Item Master.
Click
 (Search) to see a list of the pre-defined service items that are created in RB9. Service items in Service Groups, 1–7 are fixed, named items and cannot be modified. You can only edit options for service items listed in those groups, which will be explained later.
Service items appearing in Service Group 8. Attendance are editable. You can modify the name of these service items, if needed. Maybe you do not use “Full Day Per Diem.” You can open that service item, click Service Item at the top and change the service item’s name.
The Service Groups 1–8 take care of some of the basic service items you’ll bill your clients for. Items like O&1, Copy, standard exhibit charge, and Attendance. But what about all of your service items pertaining to the Service Item Subgroups you created previously? You will create all of those service items, and tie them to Service Group 9. Misc. Charges. By default, you do not see Service Group 9 because there are no service items added to the system tied to that Service Group yet. Once you create your first miscellaneous charge, you’ll see Service Group 9 appear beneath Service Group 8.
To create a miscellaneous charge, click New at the top right. In this example, we will set up a Production billing service item named Rough Draft.

Notice Service Group is fixed to 9. Misc. Charges. Again that’s because any service item you create will belong to that Service Subgroup.
First, select the Service Subgroup the service item should belong to. Remember, this is the category for the service item. For Rough Draft, we’ll select Production as the Service Subgroup.
Next, give the Service Item a name (required field). The name you type here is important because this is what you’ll see when selecting service items during Turn-In, and this is also what your clients will see on their invoices when they are billed for the service item. In this example, I’m entering Rough Draft.
To the right of Service Item is Unit Type. Select a Unit Type from the available drop-down list if the service item you’re creating is billed in multiple units of some type. In our example, Rough Draft is billed per page, so select “Pages.” What this affects is the itemization on the invoice that goes to your Bill To client. If you show the service item on the invoice, the number of units with Unit Type will display on the invoice, giving your client more information as to what they’re being billed for.
You can specify the Account No. for each service item you create (See Chart of Accounts in the RB9 User Guide).
The next field, Billing Rate, refers to the amount you’re billing your clients for the service item. You can set the rate for the service item and that rate will be used for this service item every time you create a new Billing Rate. If you bill this service item at the same amount across the board, then inputting the rate here is important because that means all of your Billing Rates will have this Service Item setup with the correct rate, and you will not have to edit the amount.
Minimum Billing refers to a minimum invoice amount for this service item. In the event of the billing calculation for the service item not reaching that minimum amount for an invoice, RB9 will use the specified Minimum Billing amount from this field.
Pay Rate Type is where you designate whether you pay your resources for the service item using a flat rate ($) scale or percentage (%). If you pay your resources $.50/page for Rough Draft, choose $. If you pay them 70%, choose %.
Pay Rate will be the amount that the resource will earn for this service item. If you have service items that resources do not get paid on, simply leave those set at $0, and RB9 will never calculate any pay for those.
-
Minimum Pay refers to a minimum resource pay amount for this service item. In the event of the pay calculation for the service item not reaching that minimum amount for an invoice, RB9 will use the specified Minimum Pay amount from this field.
Now let’s take a look at all of the slider options. If Bill Rush Applicable and Pay Rush Applicable are set to Yes, that means the billing amount and pay amount for this service item will have the Expedite (Rush) amount added to it. For most agencies, these options will be set to No because the only service items that are applicable for Expedite (Rush) fees are the transcript pages.
-
The next 2 sliders are Court Taxable and Sales Taxable. If you bill for any tax, set these to Yes. You decide at an individual service item level if items are to be included in any tax calculation. If you do not bill for any tax, leave these 2 sliders set to No.
Slide Discountable to Yes if you might give clients a discount percentage on this particular service item. The percentage of discount that a client will receive on the service item is entered in their Firms setup. If you have negotiated rates with your client that are discounted, you will set those up as individual Billing Rates, so don’t worry about setting service items as Discountable.
If you use the Reward Points System, slide Pointable to Yes if the service item should be included in the revenue calculation to accumulate points. If you do not utilize the Reward Points System, leave this slider set to No for all service items.
Client Of Commissionable and Sales Rep Commissionable are important if you have resources that bring in clients (Client Of) and/or account managers (Sales Reps) that bring in clients. Set these options to Yes if the service Item is commissionable, which means it should be added to the calculation of commission for Client Of’s and Sales Rep’s commission reports.
-
The next 2 sliders are for displaying the service item on the invoice when added to an order. If you set Show text on invoice to Yes, the service item name will appear on the invoice when added. If you set Show amount on invoice to Yes, the billing amount will appear on the invoice. Leaving these options set to No will hide the service item from the invoice.
NOTE: If you set a firm to Always print detail on invoice in the Firm setup, then their invoice printing will be fully itemized, displaying all service items and billing amounts.
The Show on web orders and Show on web turn-in sliders are for agencies that have the RB Connect plug-in.
- Show on web orders is for clients when scheduling jobs. If set to Yes, clients will be able to add that service item to the Request Services section of an online job request.
- Show on web turn-in is for resources when turning in jobs via RB Connect. If set to Yes, then resources will be able to select this service item during the turn-in process. Make sure that all service items that resources need to be able to turn-in are set to Yes, otherwise resources will not be able to complete their full turn-in of all service items.
- The last slider is Show on production sheet. Set it to Yes for service items that need your production department’s involvement. When a job is turned in, and service items are added to orders, your production department can print out the Production Sheet. It’s a report that will show them on a job-by-job basis, who’s ordering and what they’re ordering that needs to be produced. Not all items need to have Show on production sheet set to Yes. An example of something not needing that option would be appearance fees. Production has nothing to do with appearance fees, so those service items would not have that option set to Yes.
NOTE: All these options that you set in the new Service Item setup will copy to the new Billing Rates and Pay Rates you create, so it’s imperative that you set up all service items before creating your Billing Rates and Pay Rates.