Entering contacts
Contacts are the persons who are employed by or otherwise tied to firms. Examples of contacts are attorneys, paralegals, secretaries, and insurance adjusters. In order to create new contacts in RB9, you must have their firm in the system first.
NOTE: If you have an existing database of clients, we recommend importing them into RB9 using Bulk Import. If you are adding a new client, use the following procedure.
Step-by-step instructions
To enter contacts one at a time, click on Entities > Contacts.

Click New at the top right to begin the process of entering a new contact. The first thing that comes up is the Lookup Firm section. You must first search and select the firm the contact you’re creating will be tied to. Enter part of the firm name and click
 (Search). Locate the firm in the results, and click their Firm Name to select them.
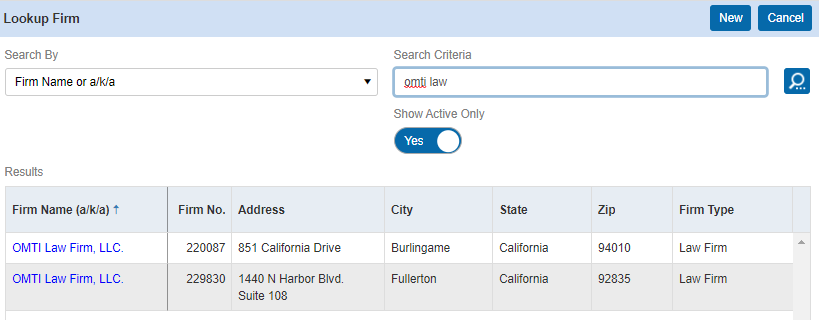
After selecting the firm, you’ll return to the New Contact window. The Firm section will display all the basic firm information. Verify that you selected the correct firm this contact should be tied to.
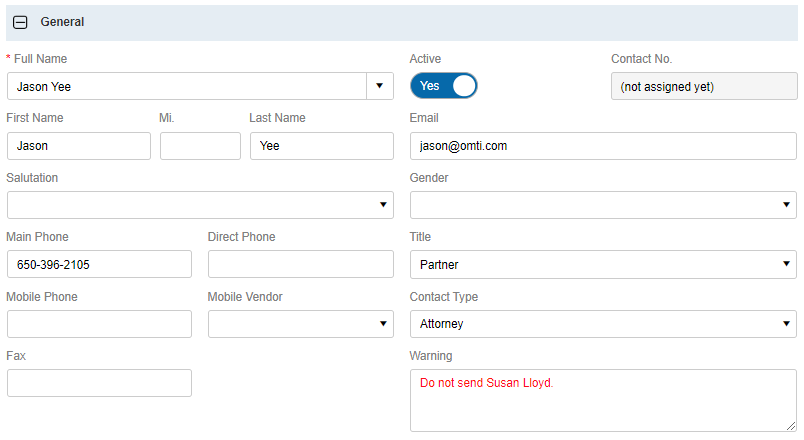
In the General section of the Contact setup, fill in the basics such as First Name, Last Name, Email, and any phone numbers.
An important drop-down menu in this section is Contact Type. Select the type of contact that you’re setting up from the drop-down selection (Refer to the RB9 User Guide, Lists > Contacts to create your own drop-down options).
You also have a Warning field here. Whatever you type in this field shows up in red, and they’re for your staff’s eyes only. The warning will be the important notes that you need to make sure all of your staff is reminded of every time they select this contact.
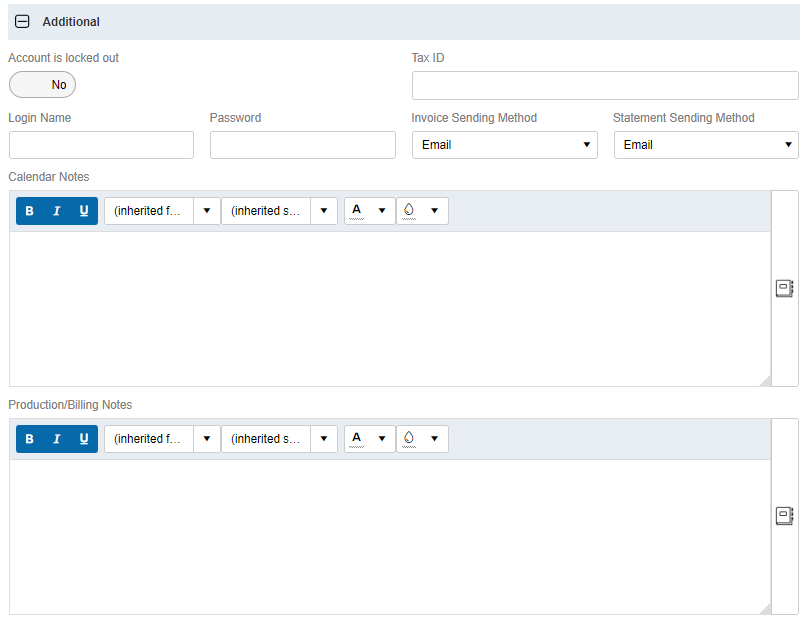
In the Additional section, set the contact’s Login Name and Password if you have the RB Connect plug-in. (If you have set your Connect Preferences to Use Email as Login Name, you will not be able to set the Login Name here. Instead, be sure you have an email address entered in the General section above. See Setting Connect preferences: Login.)
Calendar Notes are important notes for you and your staff to see that pertain to how this particular contact likes their jobs. Every firm can have Calendar Notes, and every contact can have their own as well, which will appear when you’re scheduling a job for this contact.
Production/Billing Notes will be seen during the turn-in process so important production and billing information is not forgotten. These notes will also be seen in the Production Sheet as well. The Production Sheet will show on a job-by-job basis, who’s ordering and what they’re ordering that needs to be produced. Having these notes appear on the Production Sheet also gives your production staff reminders to they don’t forget any particulars about this contact’s order.
-
Next is the Marketing section. The Billing Rate, Client Of, and Sales Rep fields will be pre-populated if you set those fields in the Firm setup. If they’re not, then you can set those manually here.
Having a Billing Rate entered for a contact can be beneficial because when you’re going through the billing process, you won’t have to select the billing rate since RB9 knows which rate to use.
If a resource brought in this contact, set the resource as the Client Of. If an account manager or sales representative went out and got this client for you, set them as the Sales Rep. This is an important step if you want RB9 to eventually print out a Sales Commission Report. Anything commission based always starts from setup, and the Contact setup is the first part of it.

-
Click Save > Save and Edit. Additional sections will appear in the Contact window with the Notification Email section appearing first.
If you entered an address in Email under General above, this section defaults to that address for the 3 types of communications that can be sent to contacts from RB9:
- Accounting: This email address is used by RB9 for invoices and statements. Statements are emailed to this email address as well, if the Consolidate Statement option in the related firm’s Additional section is set to No. If this contact does not want to receive invoices personally, you can delete their email address here and add their preferred billing email address.
- Job: This is for emailing job confirmations and cancellations. If the Ordering Contact on the job is an attorney, and they do not want to receive any Job Notification Emails, you can delete their email address here, and add the secretary or paralegal’s email address instead.
- Repository: If you have the RB Connect plug-in, clients can download files from RB Connect’s online repository. In order for clients to know what files are available for download, you send them a notification email. You can notify the ordering attorney, who is this contact; you can also add the secretary and/or paralegal to receive those Notifications Emails. This is great for when you don’t want to bother the attorney with the emails, instead you can specify only those that work for the attorneys as receiving them.
To update or delete a default address, click the hyperlinked address, make your changes and click Save, or click Delete.
To add email addresses, click
 in the Notification Email section. You can add as many email addresses as you want for each of the 3 Notification Email Types. Select a Notification Type, then enter the address in Email. Click Save > Save & New in the New Notification Email section to continue adding addresses, or Save > Save & Close when finished.
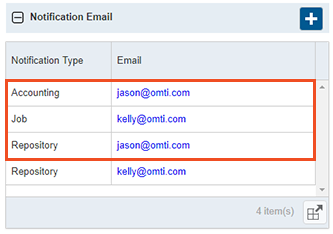
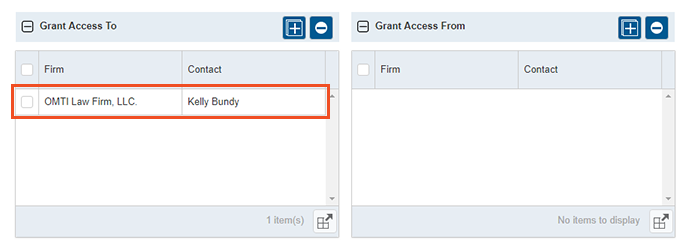
Scroll down to the Grant Access To and Have Access To sections. These sections pertain to the RB Connect plug-in. If you do not have RB Connect, you can skip this section.
Grant Access To and Have Access To allow you to give access to a contact’s job, invoice, and repository information to other contacts through RB Connect. In RB9, the jobs and invoices are tied to the Ordering Contact (attorney). So by default, related information is accessible by that contact (attorney) only. But in real life, the attorney isn’t the one who will be accessing RB Connect and scheduling jobs, paying invoices, or even downloading the repository files.
It’s always the paralegals or secretaries that take care of that work on behalf of the Ordering Contact (attorney). So we need a way for paralegals and secretaries to manage the accounts of the attorneys they work for. That’s what Grant Access To and Have Access To are for.
If you think about the Ordering Contact (attorney), all work is tied to them. If anything, they will be granting access to their information so paralegals and secretaries can do their job. So in the attorney’s Contact setup > Grant Access To section, click
 and RB9 will display all other contacts tied to the same firm. Check the paralegal and/or secretaries that work for this attorney (Contact) and click Save. Now the name of that paralegal and/or secretaries will be listed in the box.
If you go into the paralegal or secretary’s setup, and go to the Have Access To section, you will now see the attorney (Contact) listed. RB9 creates this automatically for you.
You can also Grant Access To and Have Access To to contacts in other firms as well. You’re not limited to everyone needing to be tied to the same firm.
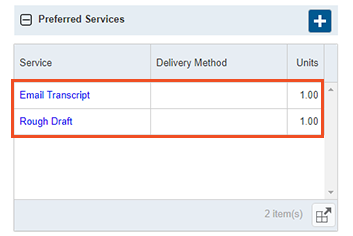
Now let’s scroll down to the Preferred Services section. This section is for adding service items that the contact always wants: their standing order. In our example below, we’ve added Rough Draft and Email Transcript. The Preferred Services will be seen by the biller when billing a job for this contact, using Prefill Services, so they don’t ever forget to add services to the invoice.
Preferred Services is not something you’ll add at first. You must first enter service items into your Service Item Master so you have services to add in this section. (Refer to Service Item Master in RB9 User Guide). Come back to this section after you’ve set up the Service Item Master.
Next to Preferred Services is the Anniversaries section. This section lets you add important personal dates at the Contact level and set reminders so you never forget those dates. Important anniversaries could be birthdays or the anniversary of when they became your client.
To add an anniversary, click
. In the New Anniversary section, set the Anniversary Type and the date. Also set Alert in advance (days) and Alert Time. At the bottom of the section, click to add the RB9 users that should be alerted of this anniversary. Then save your changes.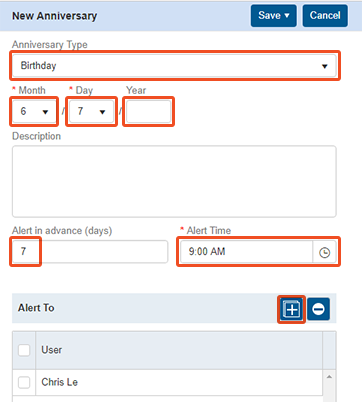
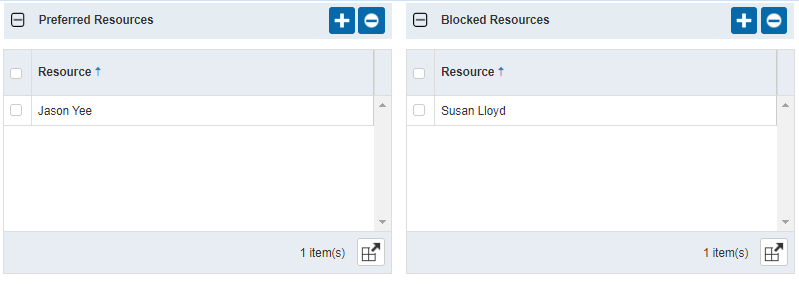
If the contact has resources they prefer to take their jobs, use the Preferred Resources section. Add resources here that the contact prefers. Then when assigning tasks for the contact’s jobs, the preferred resources will be listed first, if available.
If the contact has resources they do not want taking their jobs, use Blocked Resources. Any resource added to this section will not appear as available to assign to tasks for the contact’s jobs.
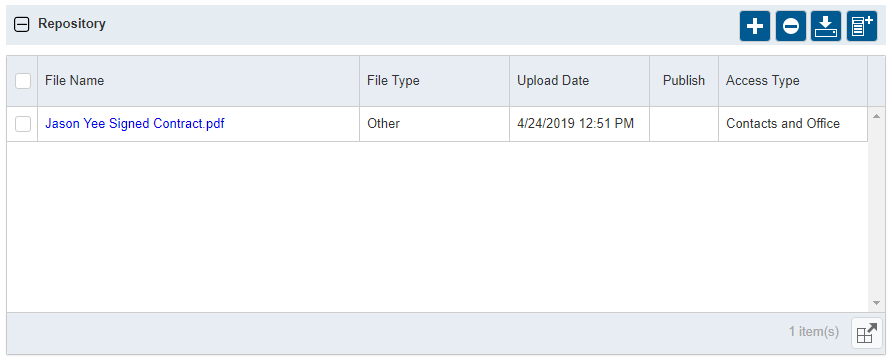
The last section we’re going to discuss is Repository. Every contact you add to RB9 has their own Repository section. If you have any important documents that pertain to the contact, upload and store those documents directly in the Contact setup. This makes it easy to find and download those documents.
An example of what you might upload to a Contact Repository, would be a signed contract.