Entering billing rates
Billing Rates contain the prices for all of your service items. Agencies often have multiple billing rates set up to accommodate specific billing needs. Billing rates can be based on negotiations with clients, networking rates with other agencies, insurance company rates, etc.
Every billing rates you create in RB9 will automatically inherit all service items set up in the Service Item Master. Not only does every billing rate inherit the actual service items, but also all default settings for each item as well. That means all rates and checkboxes set at the Service Item Master level for each item. Before setting up your billing rates, it would be best to make sure you have completed the Service Item Master setup first.
Step-by-step instructions
To open the Billing Rates function, click Setup > Billing Rates.

Click New at the top right to start the process of creating a new billing rate.
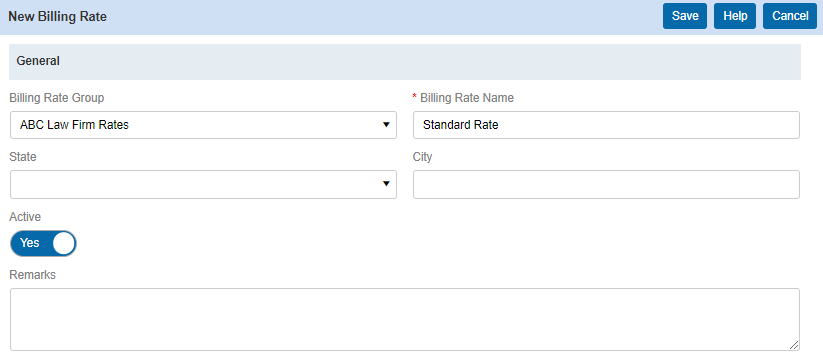
The main fields to set up are Billing Rate Group and Billing Rate Name.
- Billing Rate Group is the group or umbrella that this billing rate will fall under. In my example, I will be creating client rates for ABC Law Firm. I previously created a Billing Rate Group named “ABC Law Firm Rates.” Here I’ll select that Billing Rate Group.
- For the Billing Rate Name, give the rate a clearly specific name. The Billing Rate Name is important, because this is what you will see listed and will help you decide when to use this billing rate. In this example, I’ll have Standard, Semi-Technical, and Medical/Technical Rates for ABC Law Firm. Here I’ll input “Standard Rate” and click Save.
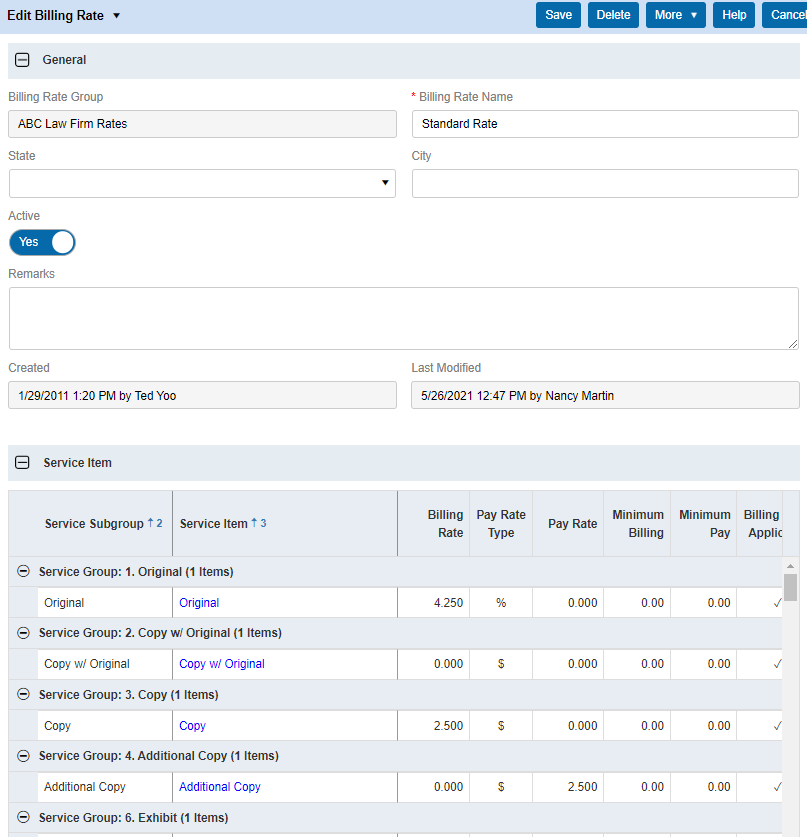
Now all of the service items will appear in the section below. Open each service item one at a time and input the billing rate for each item. If there are service items that do not pertain to this billing rate, leave their billing rate at $0, so RB9 will never bill any amount when this billing rate is used.
As you open each service item one by one, you’ll notice how each service item is set up exactly how you set it in the Service Item Master. So now you can really see how setting up each service item previously affects what you’re creating here in the Billing Rates function.
Scroll down to the Rush section and make any adjustment to each Rush Type if needed. All Rush Types are automatically inherited from the Rush Type Master.
Once you’re done editing all the necessary service items for this billing rate, click Save at the top.
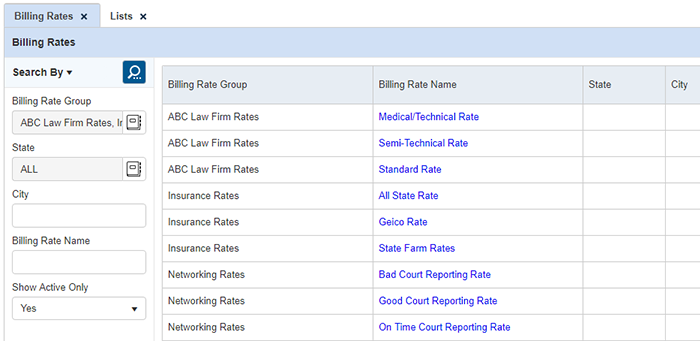
After that, create the rest of your billing rates. Below is an example of all the billing rates I could have set up if I had negotiated rates with a client, insurance companies, and court reporting agency networks.