
Entering a new job > Job Location info
In the Job Location section, you either enter the location manually or set it from the RB9 database.
Step-by-step instructions
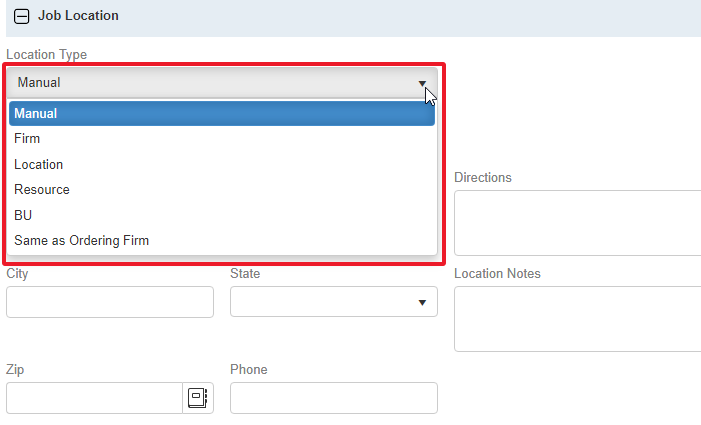
In the Location Type drop-down, select:
- Manual: Open text entry option. You key in the location as you wish, entering address fields, directions, and additional notes. Whatever location information you set here is only for the job you’re working on, RB9 does not save it as a Location in its database. Use this option when the job location won’t be used again.
- Firm: If a firm is hosting the job, and that firm is set up in your Firms function, select this option. You will be able to look up the firm from your database and select it for the Job Location.
- Location: In Entities > Locations, you can create and store job locations that are not associated with a particular client, resource, or your own offices. These could be doctor offices, court houses, hotels, etc. Create these as Locations so when you have a job at one of these places, you can search and select it here, instead of always typing it in manually.
- Resource: If you network with other court reporting agencies, enter them as Resources in RB9. Then, if another agency is covering a job for you, assign them to this job. If they’re hosting the job in their own conference room, you can select “Resource” as the Location Type, then search for and select the agency covering the job for you to set the location to their address.
- BU: If the job will take place at your offices, select “BU” as the Location Type. You can then select the correct one from a list of all of your BU’s in RB9 to be used for the job.
- Same as Ordering Firm: If you select this option, RB9 will bring in the Ordering Firm’s location information.
- NEW: Online Meeting: If you are meeting remotely, such as over Zoom, enter the meeting web address in the URL field. If it’s a Zoom meeting, leave the field blank and choose Schedule Zoom Meeting in the URL field’s dropdown. Click Yes in the popup to continue to the Schedule Zoom Meeting panel where you can review and update the meeting’s defaults. When you save the meeting settings, RB9 will fill in the meeting URL and passcode.
NOTE: The basics to entering a job in RB9 are included in the Ordering Client, General and Job Location sections. Other sections are not required to be populated at the time of entering the new job.
The next section of the New Job screen is Additional. This is where you enter notes for different groups of people, such as production staff, plus other information like the Sales Rep on the job.