
Confirming calendar via email
If you want to email Job Confirmations to clients the day before jobs are to occur, here’s what you’ll need to do.
Step-by-step instructions
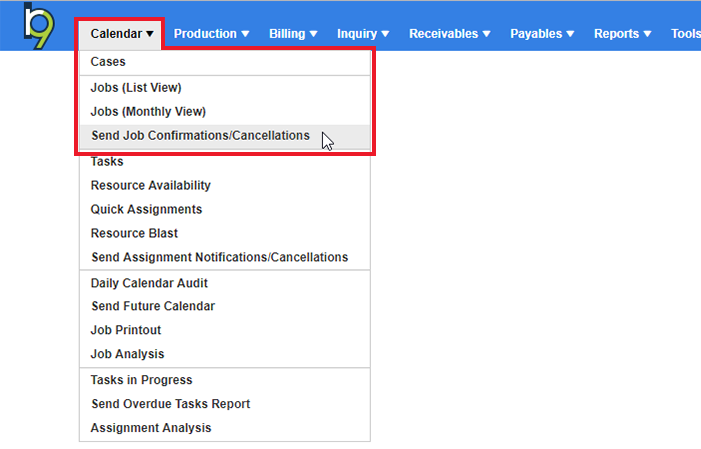
Click Calendar > Send Job Confirmations/Cancellations.
Since you’re confirming for a specific job date, select “Job Date” for the Date Type drop-down selection. For the actual date, select tomorrow’s date, since you’re confirming tomorrow’s calendar. Then click
 (Search) to display all the jobs.
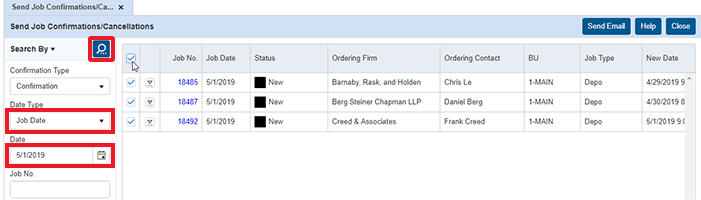
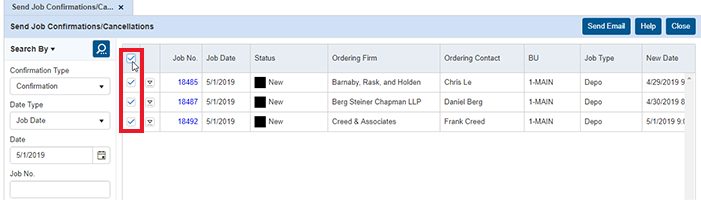
On the right side, you should now see all the jobs for tomorrow. Notice the very first column is a checkbox. Click the top-most checkbox to check all, or you can individually check jobs as you need.
NOTE: if you do not see a checkbox next to a job, it’s because there is no job notification set in the Contact setup for the Scheduled By Contact or the Ordering Contact on the job. You will need to make sure all contacts have a Job Notification email setup in order to send these types of communications to them.
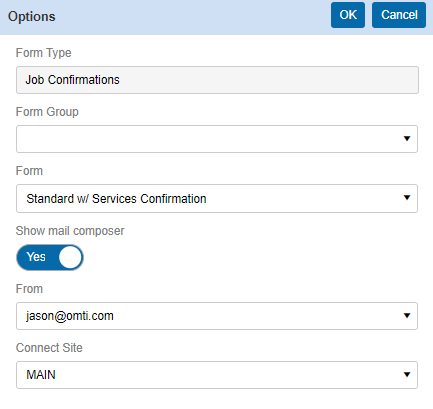
Once you have all jobs that you want to confirm checked, click Send Email at the top right. In the Options pop-up, select the type of job confirmation you want to send out from the Form drop-down. Slide Show mail composer to Yes if you want to preview the emails before sending them out.
NOTE: Show mail composer can be set to default to Yes in your User Preferences if you prefer to check any email you send out of RB9.
From will default to your default email account in User Preferences or System Preferences, depending on where your email is set up. If you have additional email accounts set up, you can click
 and select a different email account to send from, if necessary.
 Click OK to send out the email. If you do not show the mail composer, RB9 will now send out all emails automatically.
If you do show the mail composer, you will see a preview of the first job confirmation. Click Send when you’re ready. Then RB9 will display the 2nd job for review and sending, etc.
Once you’re finished, you will see a Result column on the far right of the Send Job Confirmations/Cancellations screen. If the emails were sent successfully, you’ll see the below results.
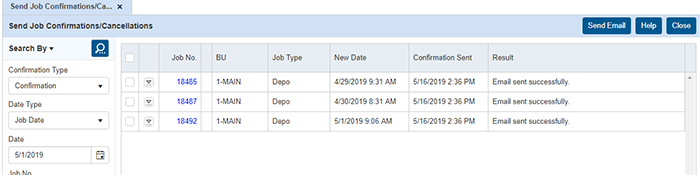
Keep the Send Job Confirmations/Cancellations screen with your search results open. As the day goes on, clients will begin responding to your emails either confirming the jobs or telling you otherwise. Here’s how you’ll change the job statuses.
In the open Send Job Confirmations/Cancellations screen, you can simply click one of the job numbers when you receive a response from a client about that job.
Click Edit at the top right of the View Job screen. You can change the job status directly from the job setup. At the top of the Edit Job screen, you will see the Status field. Click
to the right of that field and select Change Status to Confirmed. (If the client canceled the job, select Change Status to Cancelled.)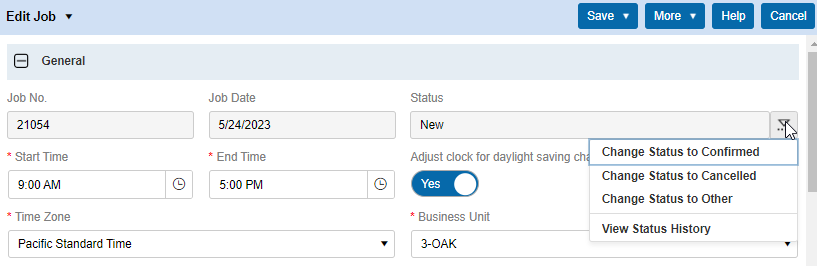
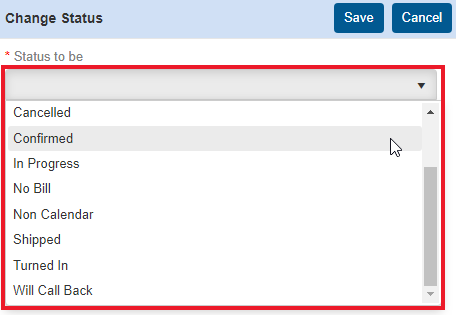
If you want to change the status to something else or you want to make notes on the status, select Change Status to Other. In the Change Status section, click the drop-down arrow in the Status to be field and select one of the default job statuses you would use for confirming the job, such as “Will Call Back” if the client is not sure yet or you didn’t get a hold of them.
-
It is recommended that you include Remarks as well, detailing any conversation you had with the client.
Once you have your data set, click Save to return to the main job detail screen. Then click Save again to close the job detail screen.
Let’s talk about one last Job Status change you have as an option. The process is the same, starting from step 7. But this time, the client is telling you the job is rescheduling. In the job detail screen, click More > Reschedule Job.
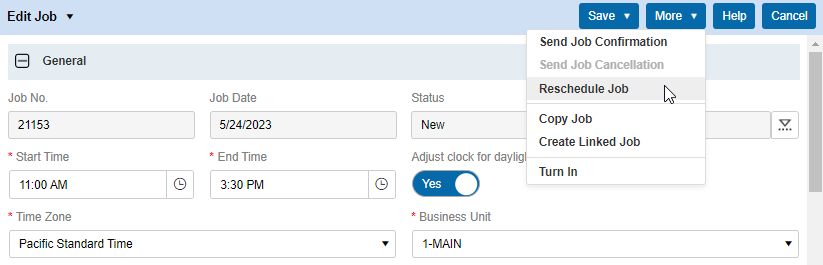
When you reschedule a job in RB9, the original job will automatically be cancelled and all the original job information will be copied to a new job. All you have to do is pick a new date and time.

After you click OK, the new job will be saved and you’ll return to the original job to see that the status of that original job is now “Cancelled.”
Repeat these steps to confirm all jobs on your calendar via email.
For clients you need to call to confirm, see Confirming calendar via phone.