
Entering a new job
Entering a job in RB9 is one of the most important features in the system. The job information is critical for your staff to know important items about jobs; and also for your resources, to ensure they know everything they need to know about the jobs they’re assigned to.
The job is the calendar entry that your client is sending to you, letting you know they need a resource on a specific day and time. At this point, you either received the job information via email in the form of the notice, or you’ve received a call from the secretary or paralegal, requesting you schedule a job on behalf of the attorney he/she works for.
Step-by-step instructions
To begin entering a new job, you can use 1 of 3 functions. Click Calendar >
- Jobs (List View)
- Jobs (Monthly View)
- Jobs (Weekly View) (RB9 Standard only)

In any of these functions, click New at the top right to start inputting the job.
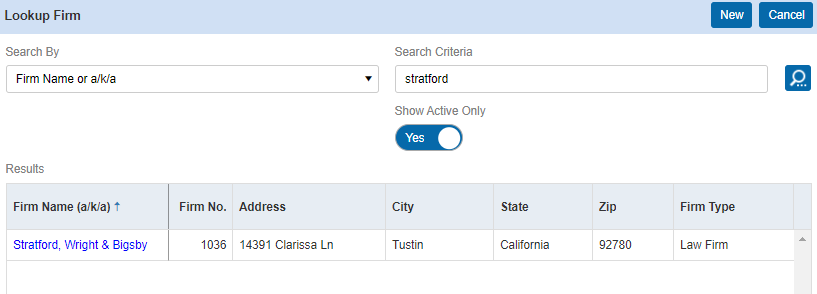
The Lookup Firm panel opens. Here you’re searching for the firm that is scheduling the job. Type in any part of the scheduling firm’s name (minimum of 3 characters) and click
 (Search). The results will appear below where you searched. Click the Firm Name of the scheduling firm.
Note: If the scheduling firm does not exist, click New at the top right to enter the firm into RB9.
Once you select the scheduling firm, you will be taken to the main New Job screen.
Ordering Client
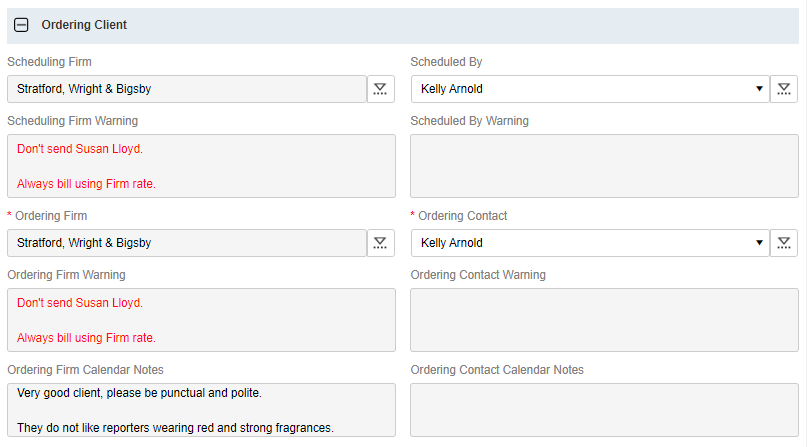
In the Ordering Client section, you will see that the Scheduling Firm and Ordering Firm are pre-populated with the firm you selected after searching.
Step-by-step instructions
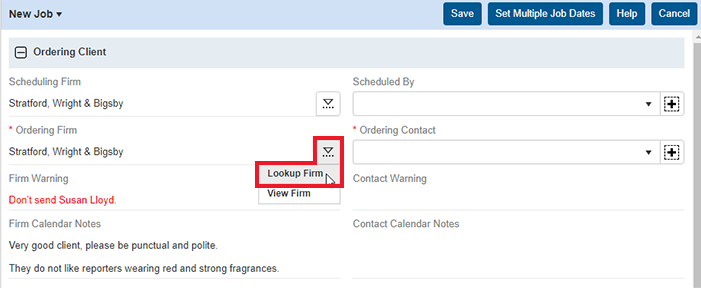
Most of the time, the scheduling firm is the ordering firm; that’s why the system defaults the 2 to be the same. If the firm which will be responsible for a job with your company is different from the scheduling firm, you can change it here.
For example, if a paralegal from a branch office called to schedule a job on behalf of an attorney at another office for the same firm, you can click on the Ordering Firm field’s drop-down arrow and select Lookup Firm. This will allow you to search and select the Ordering Firm, which would be a different office from the Scheduling Firm.
-
The Scheduled By and Ordering Contact can be set by clicking the drop-down arrow next to each field. Both of these drop-downs will display all contacts that belong to the firm. Set:
- Scheduled By to the secretary or paralegal.
- Ordering Contact to the attorney responsible for the job.
If neither exists in the system, add them by clicking
 next to their drop-down. Then enter the new contact into RB9.
 After selecting the scheduling contact and ordering contact, notice the fields below: They may contain warnings for the scheduling client (both firm and contact warnings) and the ordering client (both firm and contact warnings). Those fields come from the entities’ records in RB9. Scheduling Firm Warning and Ordering Firm Warning come from the Firm’s setup, and Scheduled By Warning and Ordering Contact Warning come from the Contact’s setup.
Below that you will also notice the Ordering Firm Calendar Notes and Ordering Contact Calendar Notes. Again, those are pulled from the setup of each record and are a good reference for your calendar department so they can always read important notes about something particular pertaining to the client selected.
General
The next section has important basic information about the job that is critical for the assigned resource to know.
Step-by-step instructions
-
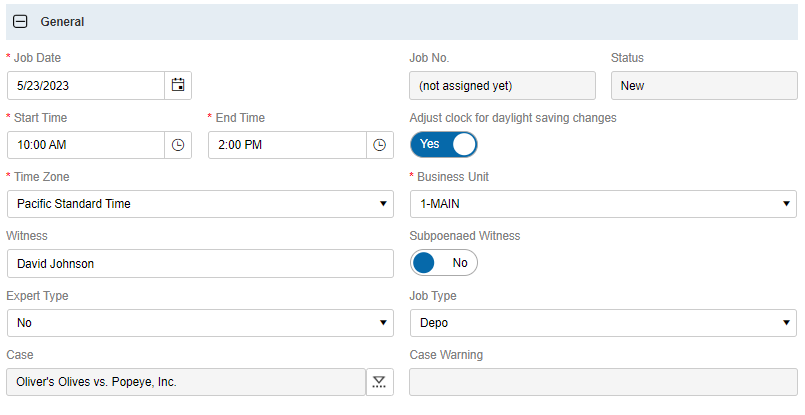
Job Date is the date the resource is needed to cover the job. Click
 on the right of the field to select the date.
 -
Start Time and End Time are when the job begins and ends. Click
 to the right of each field to set each time respectively. The end time of a job is required because assigning resources to jobs in RB9 is down to the minute for availability. This is to ensure you can assign a resource to multiple jobs in a day, if need be. If you do not know the end time of the job, a good option to use is 2 hours in length.
NOTE: End Time can be hidden from the Assignment Notification that is sent to assigned resources. It’s a merge field on the form in the Form Templates function that can be removed so resources never see that field. To learn how to customize notices and other forms in RB9, see Form Templates in the RB9 User Guide.
Set the Time Zone (default set in System Preferences), and slide Adjust clock for daylight savings changes to Yes. That option is important to have set to Yes if you plan on emailing the iCalendar file to clients and resources. The time of the job will adjust in the iCalendar file if the job is in another time zone than from the default setting.
Business Unit (BU) is important, because whichever BU you select here will follow the job through its entire process. Any revenue generated or any reports you run based on BU will have anything pertaining to this job tied to the BU you select here.
If you only have 1 BU in your system, makes sure that BU is always set (default is set in User Preferences).
At this point, you have entered all the RB9-required information for the job. You can save the job now and continue to the next step, or you can continue to enter information you have about the job.
Continuing with the General section, in the Witness field, type in the witness name. If you have multiple witnesses to enter for a job, you can enter all witnesses in this field, separated by a comma.
Subpoenaed Witness is a slider option that is for notation. This could be important to let the assigned resource know that they could be dealing with a hostile witness.
-
Expert Type is a drop-down select with options you set as different types of witness experts. You create options and manage the drop-down list in the List function. (For instructions on RB9 lists, refer to the User Guide.)
-
Job Type is important, it identifies the category for the job that you’re covering. If you need to assign a court reporter to the job, Job Type will be Depo. If it requires a videographer, Job Type will be video. Again, you can manage the drop-down list in the Lists function.
If the job is part of a case, click
 next to the Case field. Either look up a case and select it to tie this new job to an existing case in your system. Or click New at the top right of the Lookup Case section to create a new case.
Job Location
In the Job Location section, you either enter the location manually or set it from the RB9 database.
Step-by-step instructions
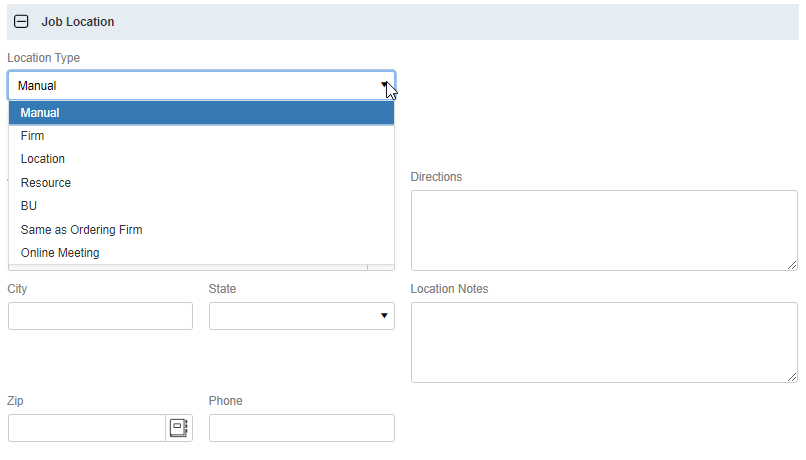
In the Location Type drop-down, select:
- Manual: Open text entry option. You key in the location as you wish, entering address fields, directions, and additional notes. Whatever location information you set here is only for the job you’re working on, RB9 does not save it as a Location in its database. Use this option when the job location won’t be used again.
- Firm: If a firm is hosting the job, and that firm is set up in your Firms function, select this option. You will be able to look up the firm from your database and select it for the Job Location.
- Location: In Entities > Locations, you can create and store job locations that are not associated with a particular client, resource, or your own offices. These could be doctor offices, court houses, hotels, etc. Create these as Locations so when you have a job at one of these places, you can search and select it here, instead of always typing it in manually.
- Resource: If you network with other court reporting agencies, enter them as Resources in RB9. Then, if another agency is covering a job for you, assign them to this job. If they’re hosting the job in their own conference room, you can select “Resource” as the Location Type, then search for and select the agency covering the job for you to set the location to their address.
- BU: If the job will take place at your offices, select “BU” as the Location Type. You can then select the correct one from a list of all of your BU’s in RB9 to be used for the job.
- Same as Ordering Firm: If you select this option, RB9 will bring in the Ordering Firm’s location information.
- Online Meeting: If you are meeting remotely, such as over Zoom, enter the meeting web address in the URL field. If it’s a Zoom meeting, leave the field blank and choose Schedule Zoom Meeting in the URL field’s dropdown. Click Yes in the popup to continue to the Schedule Zoom Meeting panel where you can review and update the meeting’s defaults. When you save the meeting settings, RB9 will fill in the meeting URL and passcode.
Additional
In the 2nd to last section of the New Job screen, you can enter some important notes about the job that can be passed along to others receiving communication pertaining to this job.
Step-by-step instructions
None of the Additional section fields are required.
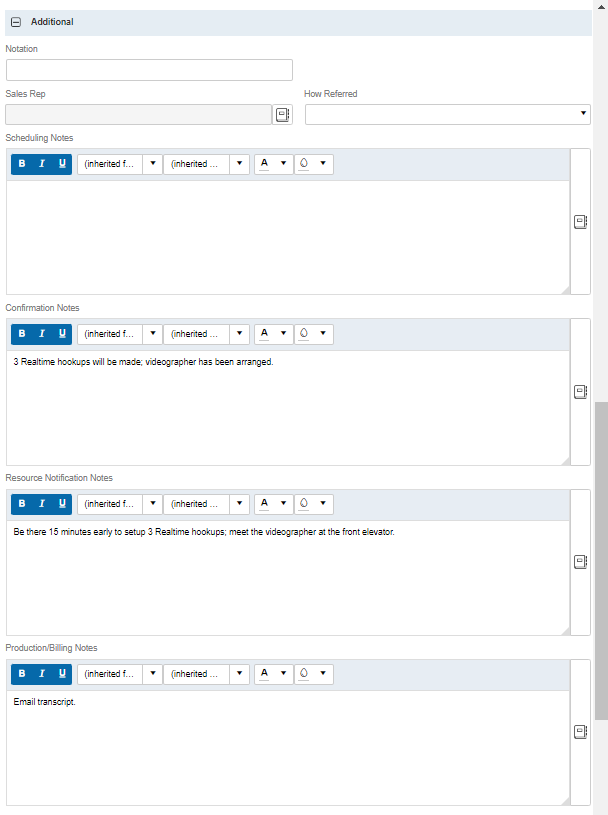
- Notation is a free-text field, 24 characters in length, that appears as one of the columns in the search results in the Jobs (List View) function. Use it for information, like codes for special job requirements, that would be handy to see outside of the job, rather than you having to click to enter the job setup to find that information.
- If there is a number in Rescheduled From and/or Linked Job, you can click
 to view/ edit the other job.
 - Sales Rep will automatically populate if you have a resource tied to the contact. In the rare instance you need to set the sales rep manually for a job, click
 > Lookup Resource to search for and select a sales rep.
 - How Referred is a marketing tool. Selections here would be how did you receive this job. Additional selections for this drop-down can be managed in the Lists function.
- Scheduling Notes is where you would save notes about the job that you don’t have to share with the client, resource, or your production/billing staff.
- Confirmation Notes is very important because whatever you type in this field, will appear on the confirmation letter that is sent to your client.
- Resource Notification Notes is an additional note section for the assigned resource. If you have any other information pertaining to the job that you want to pass along to the assigned resource, enter the notes here. These notes will appear on the Assignment Notification letter that you email to the assigned resource.
- Production/Billing Notes will be seen at the time of RB9 turn-in and also on the Production Sheet. Anything important pertaining to Production and Billing for this job that you need to remind your staff about, enter those notes here so they can see them when producing the job.
Repository
The last section of the New Job screen is Repository. Every job you input into RB9 will have a Repository section. Use this section to upload important files that pertain to the job.
Step-by-step instructions
First and foremost, you should upload the notice to the job. The notice, when uploaded to the job, will automatically attach to the Assignment Notification email sent to your assigned resources. Other files you’ll want to upload could be copy order forms and errata sheets.
To upload a new file, click
 to the right of Repository.
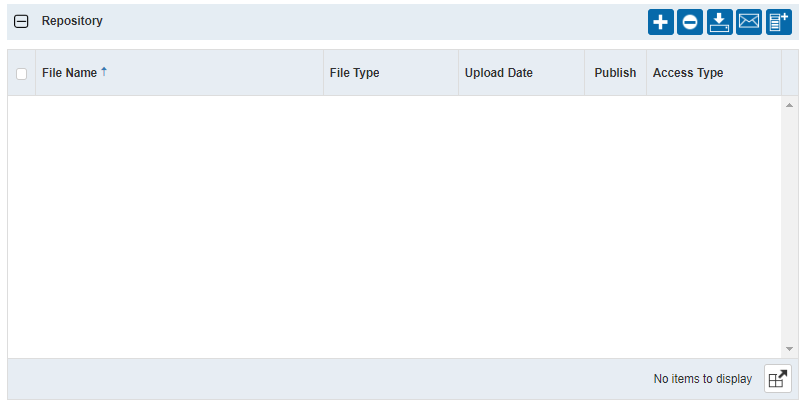
In the Select Files section, drag your file into the box or click inside the box to upload the file.
After selecting your file, you will see it listed at the top of Select Files. If you have additional files to upload for this job, repeat this step.
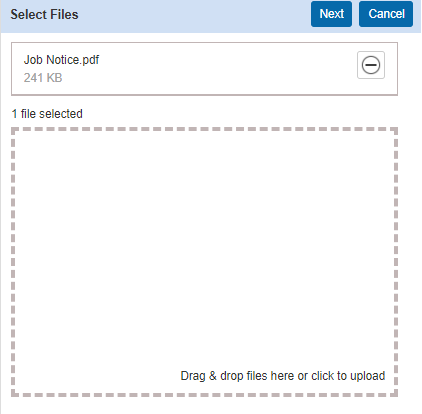
Once you have all the files listed, click Next.
In the New Repository section, you will see the file(s) you’re uploading. You will need to set some options:
- File Type is important for RB9 to know which files to include with different communications. In my example, since I’m uploading a notice, you can see I selected “Notice” as the file type.
- Publish is important if you have RB Connect. If you check Publish, that file can be downloaded by clients and/or resources in RB Connect.
- Access Type is used in conjunction with Publish. If files are published, you set the Access Type for who can download the files.
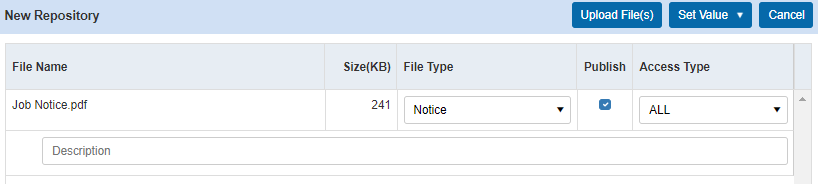
Lastly, enter text in the Description field if you want to include a description about the file. Repeat these 2 steps for all files listed in the New Repository section.
Once you’re done, click Upload File(s) to complete the upload.
Once you have all the data input, you can click Save at the top. RB9 will now give this job a job number and a status of “New.”
After you save the job, more sections will appear to allow you to enter more information about this job. Before you move on to those sections of the job setup, let’s go to the next step, which will cover sending out a Job Confirmation.